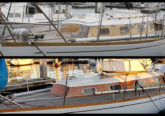
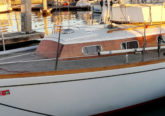
One of the first repairs I knew I would need to make to this Albin Vega was the significant amount of corrosion at the base of the mast. Over the last few weeks I was able to drop the mast, make that repair (among others) and then re-raise the mast, all in my slip using basic materials.
Before getting into that though, some news. My Albin Vega is now for sale, go here for details. I’ll explain further in a subsequent post, but I will say now that my circumnavigation is still happening.
So onto the repair. In order to lower the mast I used an A-Frame and tackle to first lift and then lower it. The materials:
- 4 x 10′ long 2×4’s
- 5 x 1/2″ lag bolts w/ nuts and washers
- Short piece of 1/4″ angle aluminum at the apex to attach tackle
- Line at the base of the legs to attach them to the stanchion bases to avoid sliding
- Line/rope which is used as stays for the A-frame, attaching to the aft/fore most cleats. My A-frame used 4 stays total
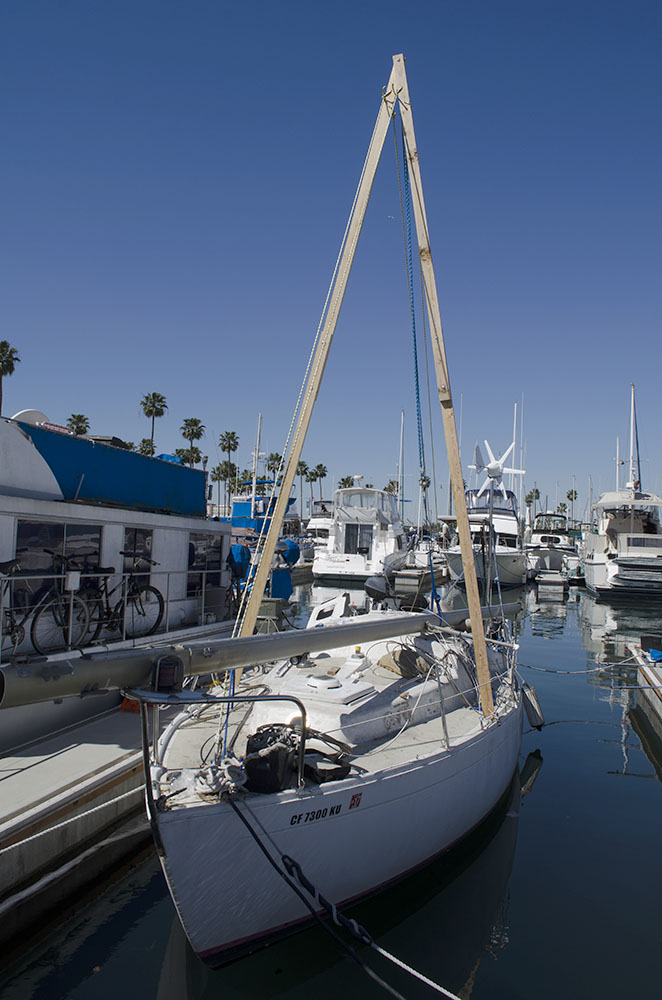
The procedure has been outlined a few times elsewhere, basically build an A-frame that extends at least ~2 feet above the spreaders (more is better) and use tackle (I used the mainsheet) to do the hoisting. I will quickly note some things I learned:
- Taller is better for the A-Frame
- Low-stretch rope used for A-Frame stays will add much peace of mind
- Using the mainsheet works, but is sketchy (more substantial tackle would add a lot of psychological comfort)
- Use tape to secure the lower shrouds in a vertical position on the chainplates to insure they don’t kink while raising
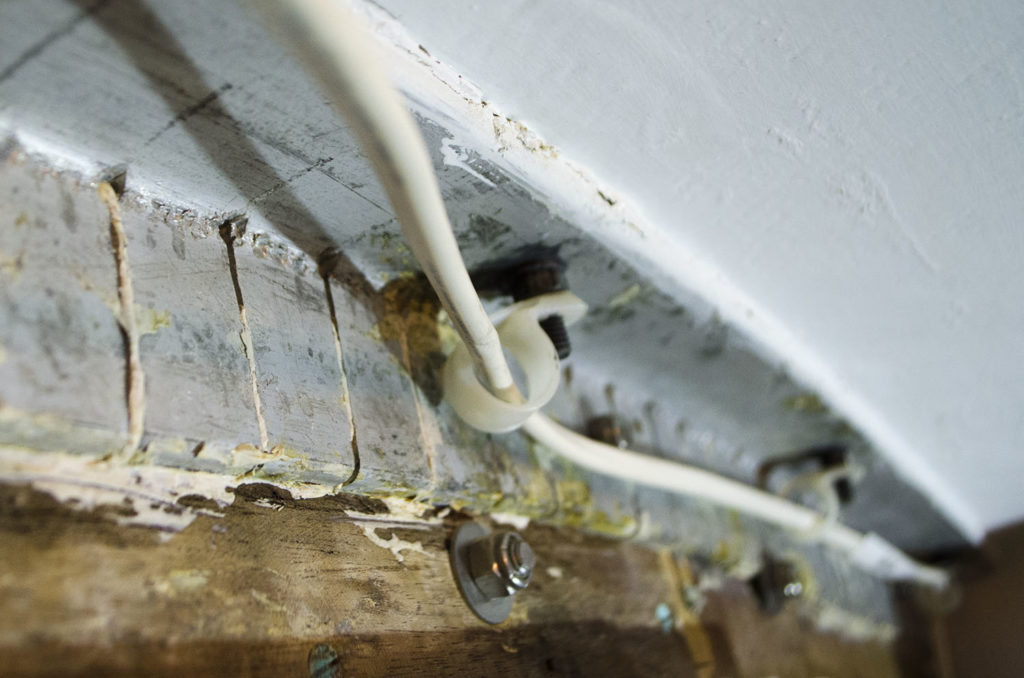
Now onto the repair itself. This is what my mast base looked like before being repaired:
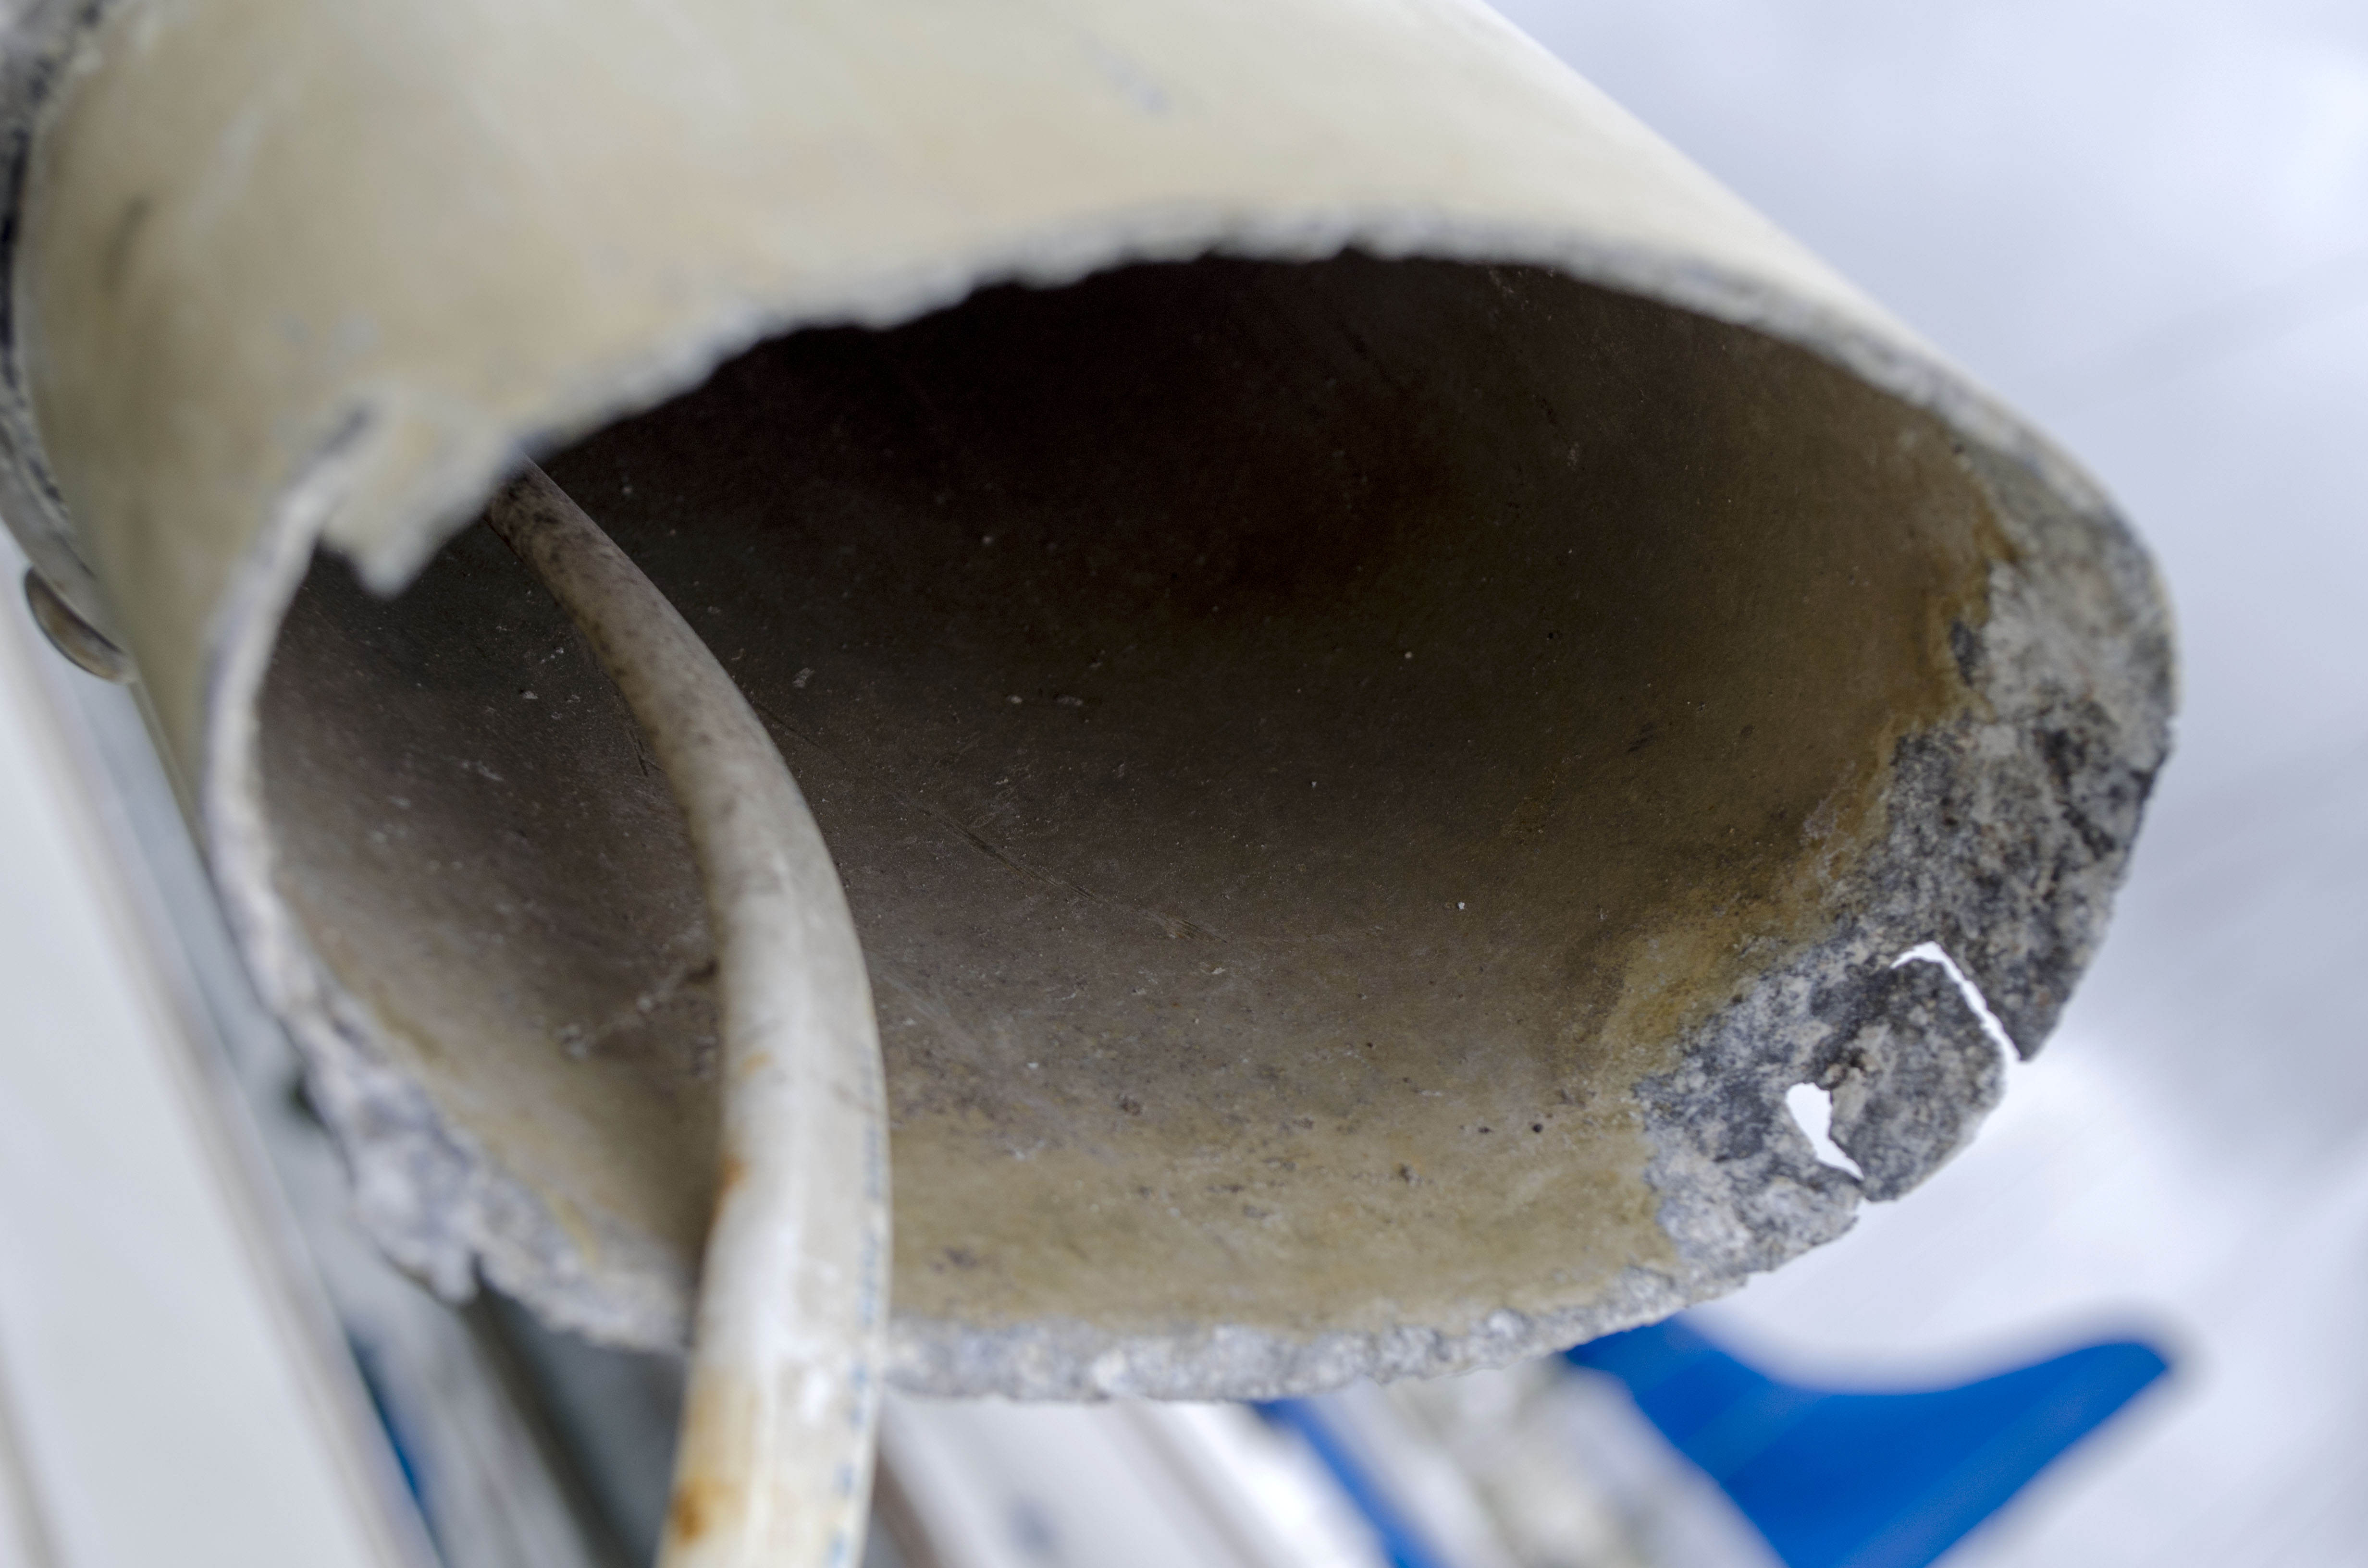
Yikes! This is caused by galvanic corrosion, two dissimilar metals not playing well with one another. The mast step arrangement was also ugly:
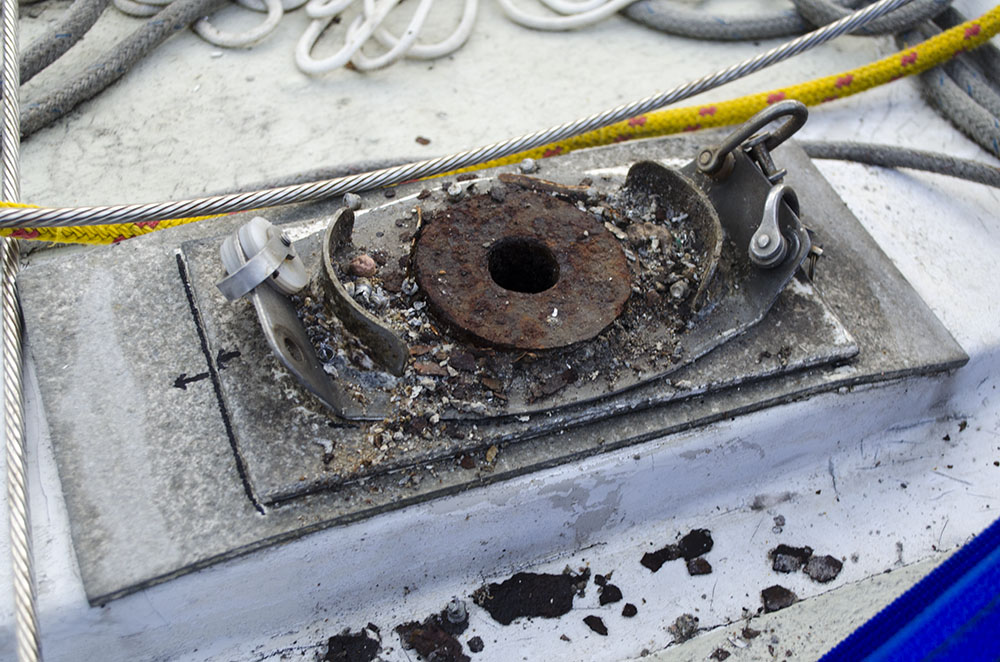
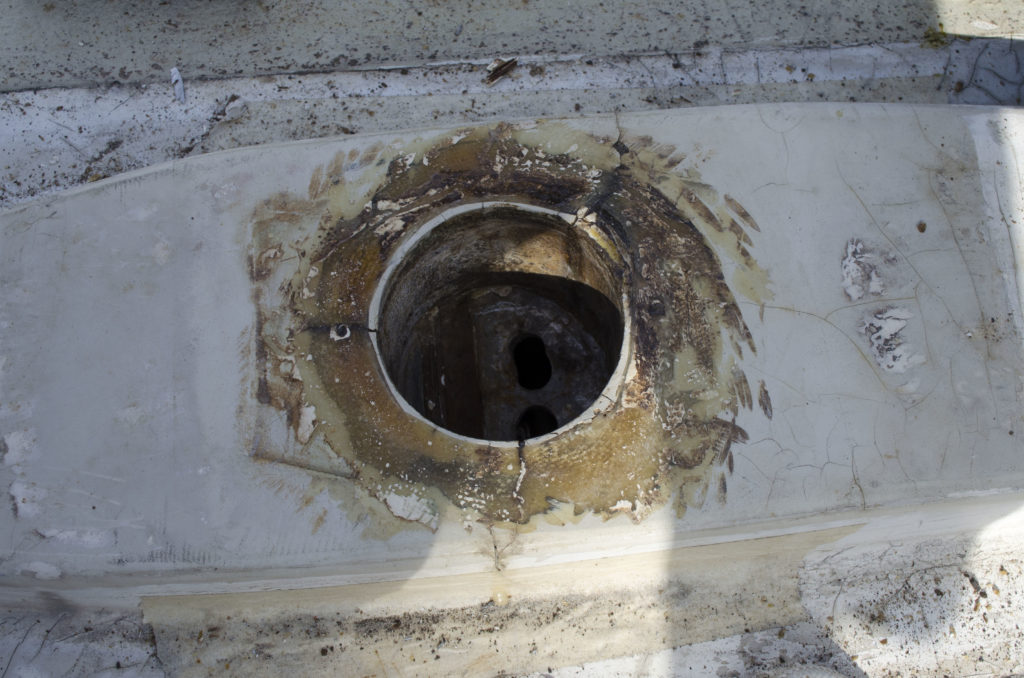
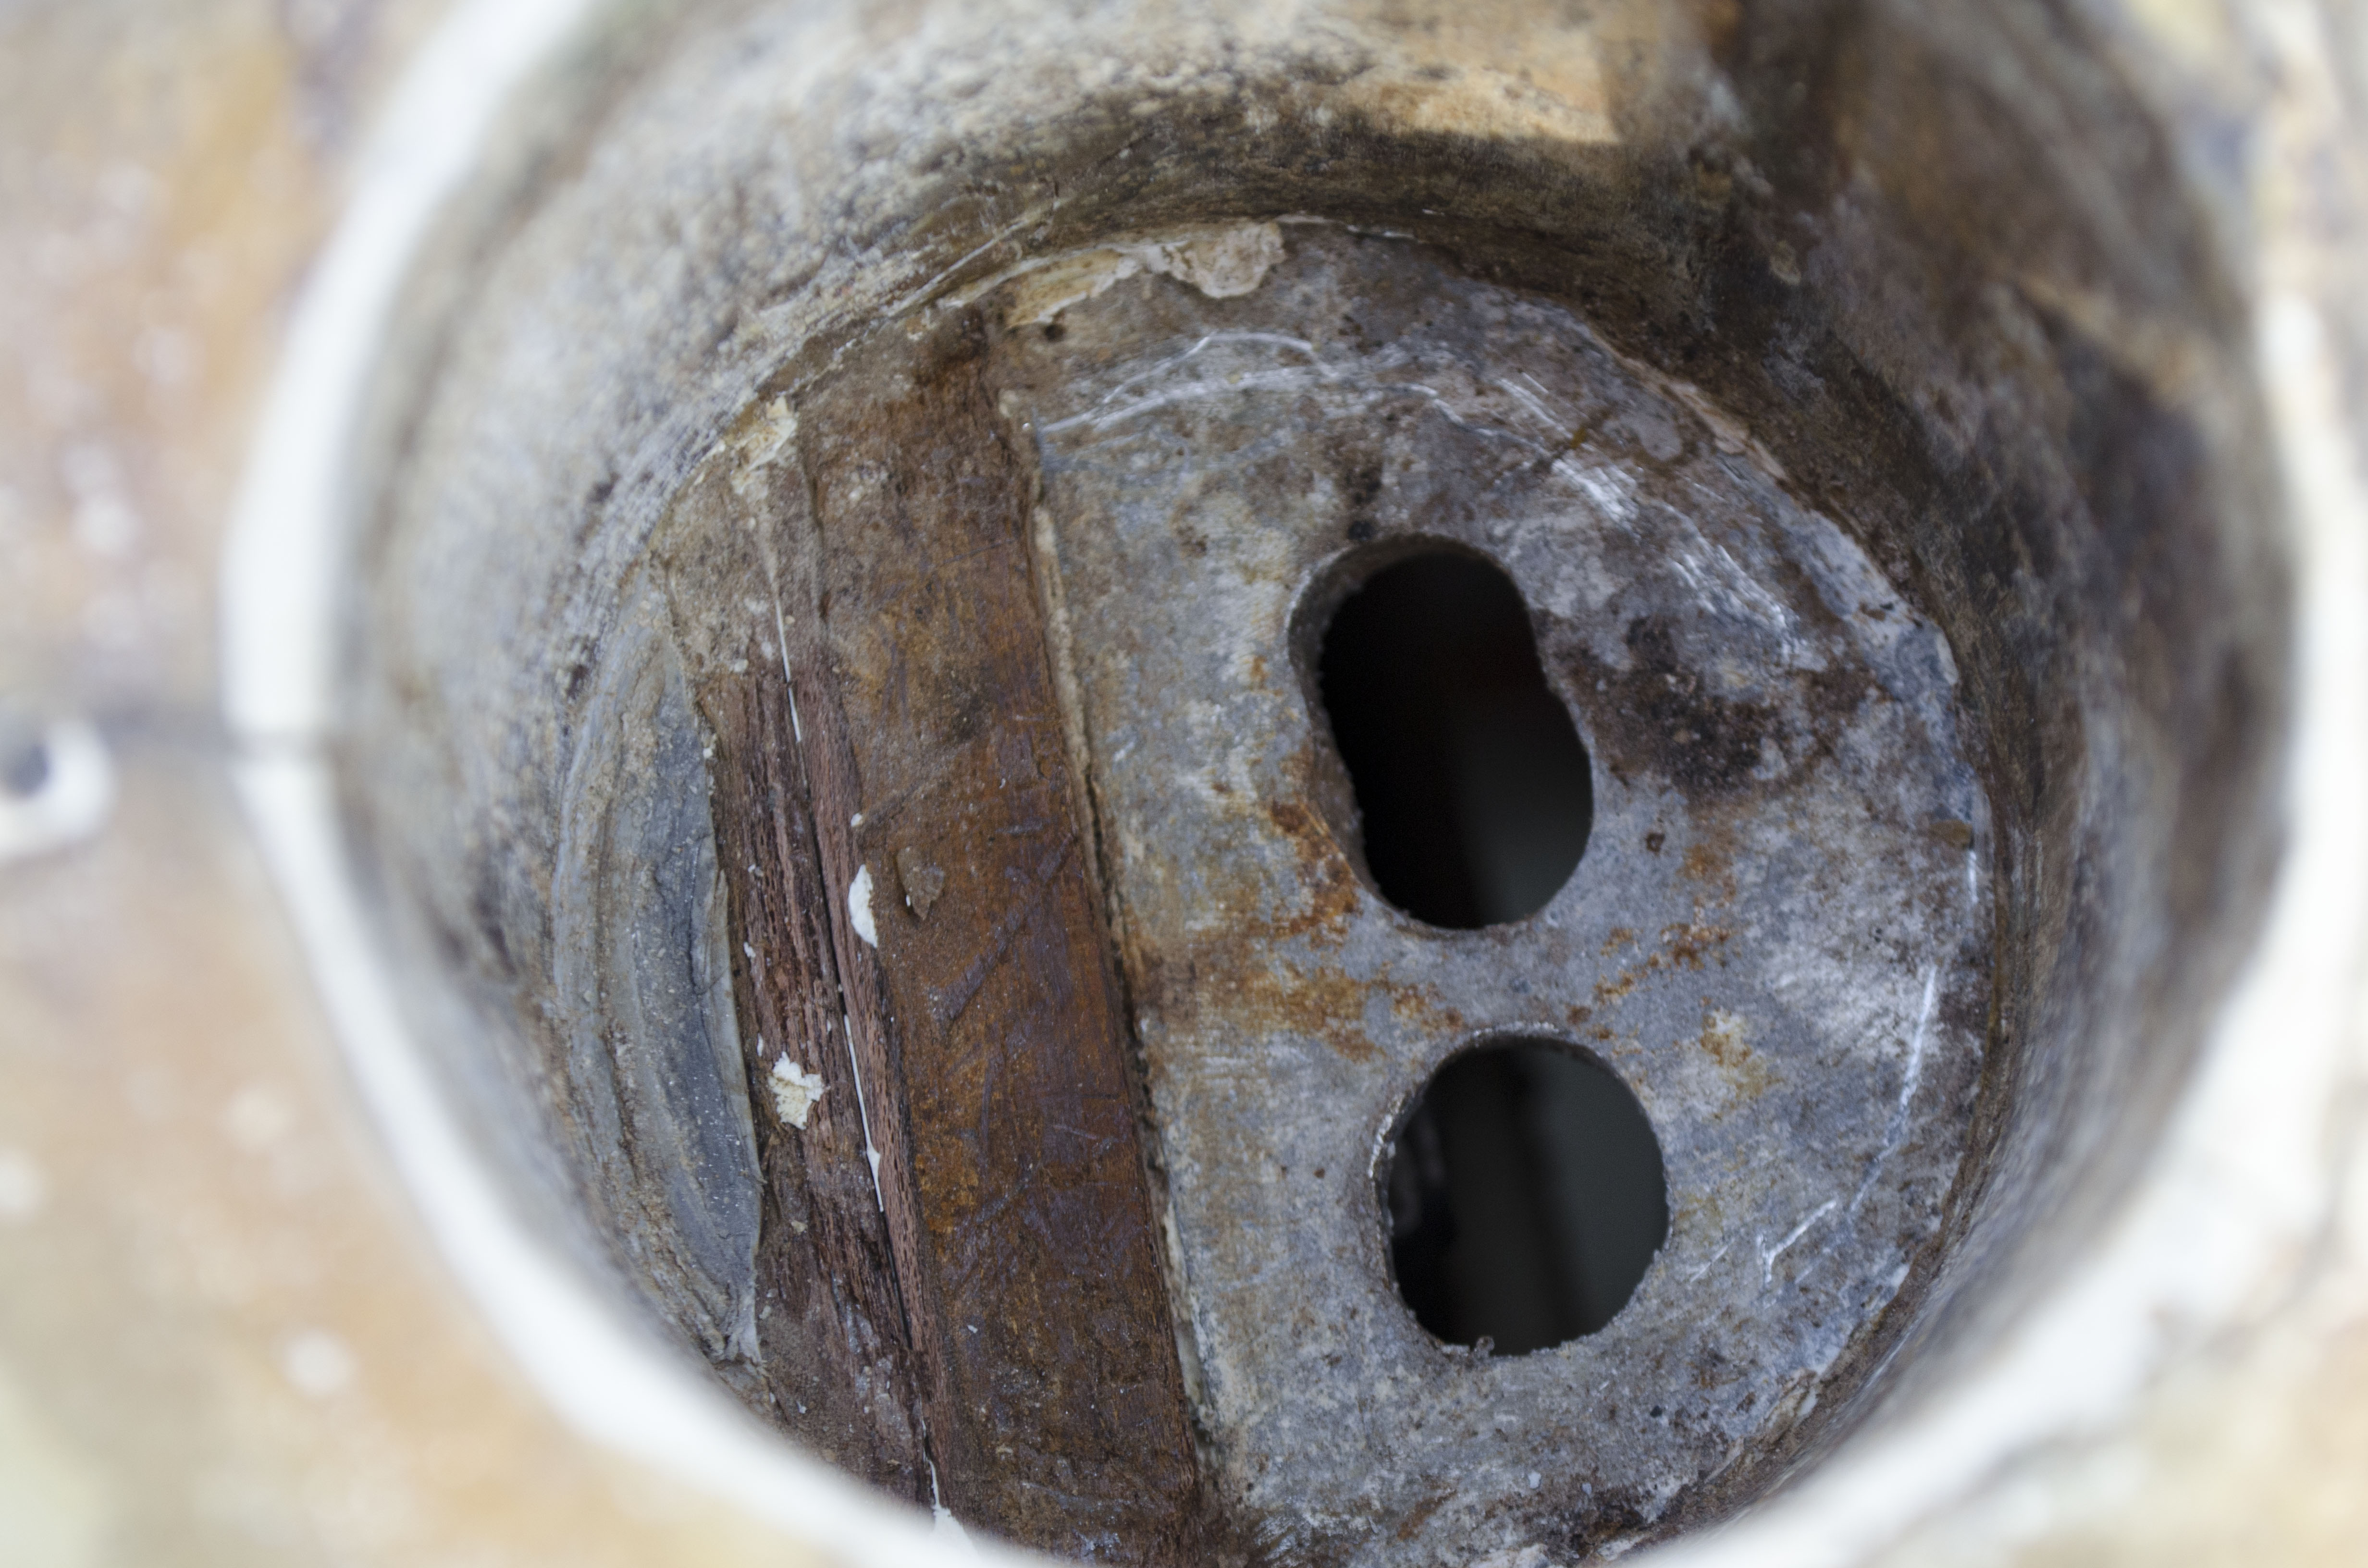
Also yikes-worthy! Getting started, I removed that plug you see in the center. Easier said than done, to say the least. But after a day of wrestling, I did manage to get it out. This is what I was left with:
It became evident that at some point, someone put a lot of effort into reinforcing the mast step. They actually did a very good job below decks reinforcing the step. An SS plate mounted aft and aluminum angle fore, sandwiched between them is the wood bulkhead. The aluminum had slots cut into it, allowing it to be formed to the curvature of the cabin top. Ten bolts mate the three pieces. Additional wood supports then help transfer all that load down to the cabin sole. Here is what that looks like inside facing forward:
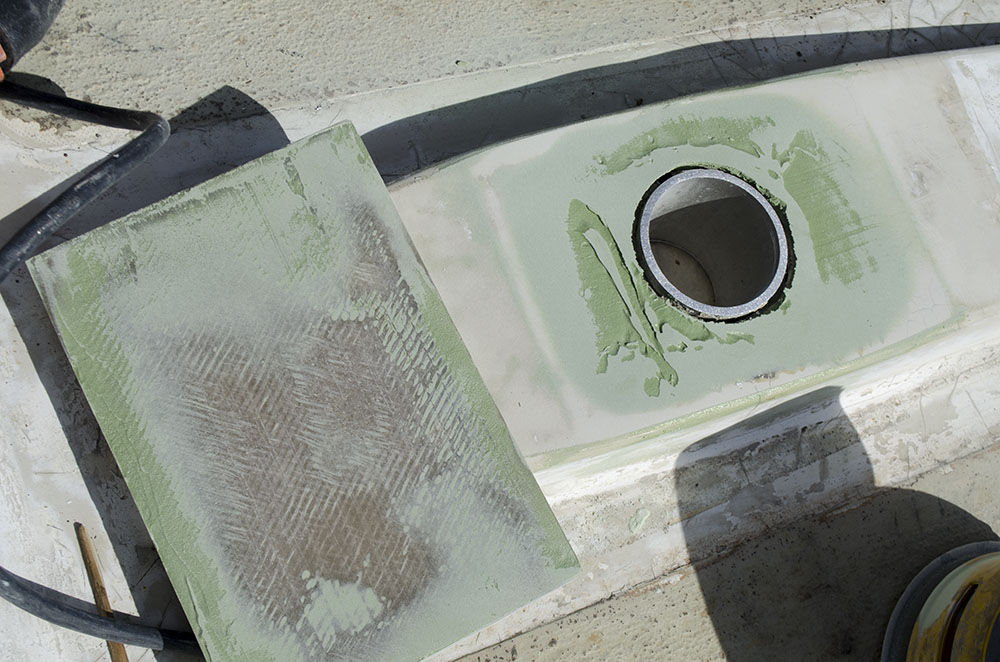
Whoever designed this did so in a way that would displace the force of the mast onto the aluminum angle, SS plate and bulkhead, which would then distribute that load across the bulkhead and down to the sole. I didn’t like the plug arrangement, but I did like the concept as a whole. So I decided to retain the features I liked and modify the ones I didn’t. Inside that gaping hole looked like this:
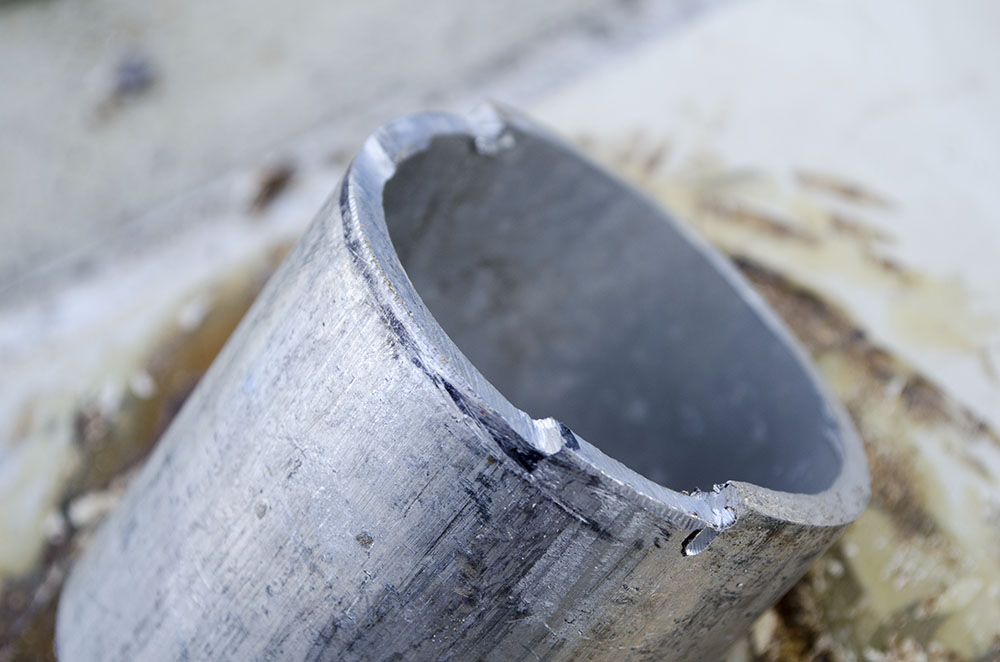
What I did to replace it would be better understood if I just show you. The tube I used is 3″ 6065 aluminum, 1/8″ thick:

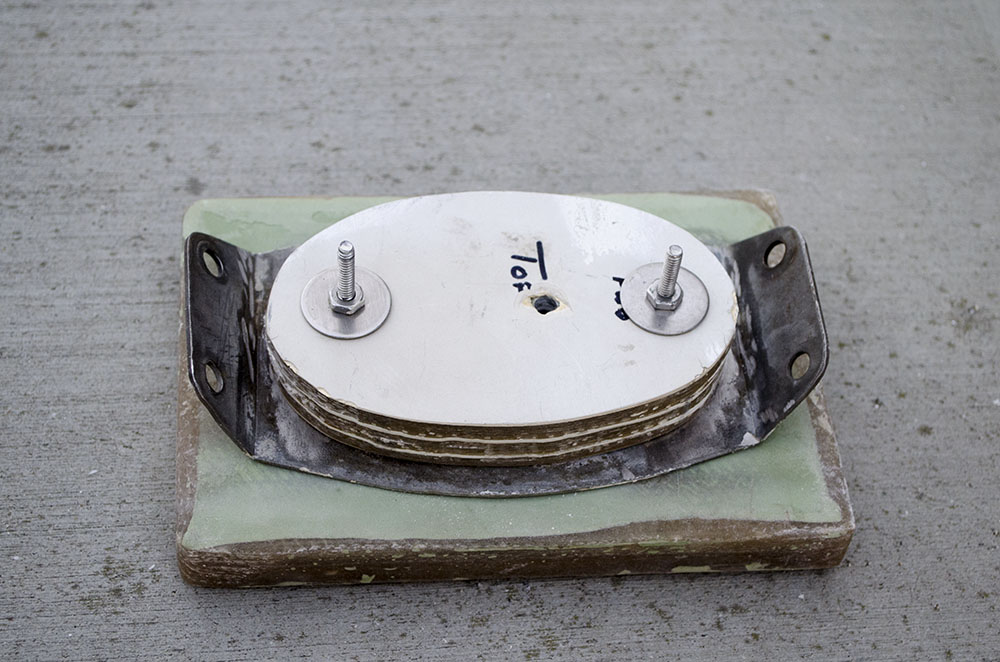
Using the cut section of mast for the measurement, I made a spacer by encapsulating G10 in fiberglass. I gave it a large footprint to insure a widely distributed load.


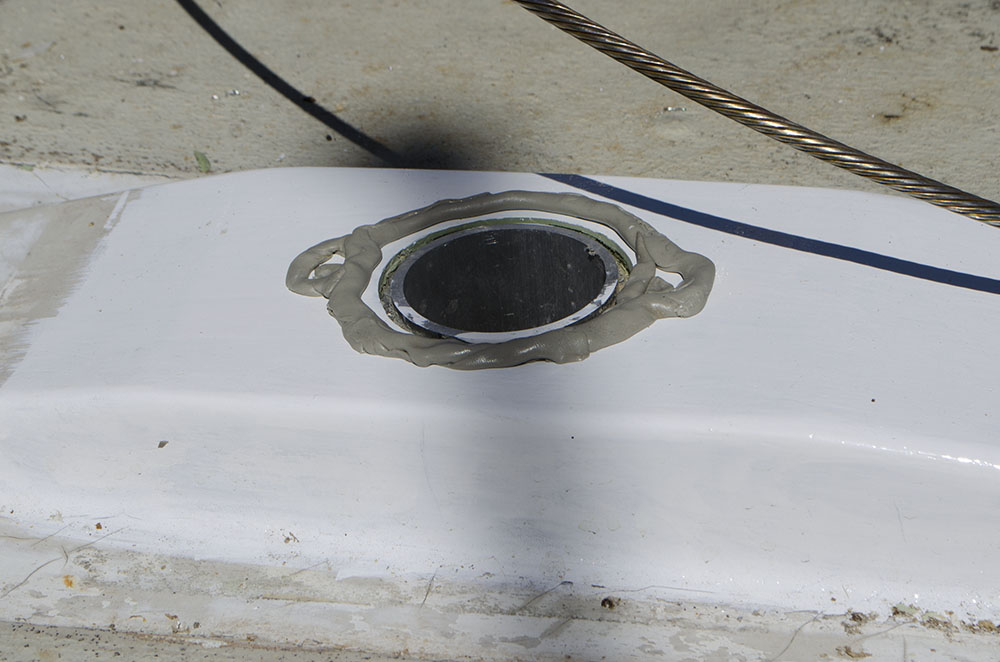

I’m very pleased with the end result. Though it was a more drawn out process than some would have taken on, I don’t foresee the base being an issue again with this fix. It also looks much better than what it started as.
The most difficult and, let me be clear, very sketchy part of the operation was having the mast suspended in the air, being held up by tiny 3/16″ SS pins that seemed sure to break at any moment. Dropping and raising the mast in the slip is very doable, but heed my aforementioned advice, particularly the height of the A-Frame and stretchiness of the rope used for the stays.


8 Comments
Hi J. I came to know of this through Cruising Forum. Well done, well crafted and well sorted through internet advice. I’m in Sydney Oz’tralia and I would be pleased to be in touch and have you stay local as you journey. Please personal message me. Fare weather and foul, best wishes. A
Thanks A! I’ll be in touch when I get nearer to Oz, feel free to send me a message anytime.
Hello J. You are most welcome in Sydney. I know this end of the Pacific. If you put chipboard into a mast base the I suggest you acknowledge with honor or correct me with facts and actual.
If not, then your early reputation will be world wide announced, before you even set voyage. Not my voyage situation. Please don’t leave a maintenance death trap as you choose another vessel.
Doubtfully, A.
As mentioned – it is not chip board, it is fiberglass.
Jacob, I too read about your V27 (being for sale) on ‘Cruisers Forum’, and found my self wanting to look at your web page. I think you did a very detailed mast step refit on this boat and your repair appears as seaworthy as any I have seen on any boat over the years. Lastly, you remind me of myself 40 years ago, full of interest in Life and what’s around the next bend! Never stop exploring or being willing to tackle something you’ve never done before. Now I know I’ll be logging on here to view all of your other travel logs and enjoy your creative photography as well. Don’t forget to join ‘Cruisers Forum’ as I’m sure more folks over there will come around to enjoying your travels as well! Bon Voyage! Pat
Thanks Pat! Great hearing of third party approval. Although I’ve been working on land vehicles my whole life, this boat stuff is fairly new to me…so it’s comforting that my methods meet the standards of the informed community.
It’s funny you say that [I remind you of you], as the man who sold me the new boat at such an incredible price said the same thing. Out of curiosity, how do you find life on your end of the spectrum, are you still excited and compelled to push boundaries?
You can find me over at CF, username “AmericanVagrant”. I lurk quite a bit, but am pretty selective about the conversations I join (both because they’re divisive and because I can’t proclaim to have a vast, infallible knowledge about something I’ve only been doing for a relatively short amount of time).
At any rate, hope you can find some entertainment in my journey. Be sure to stay in touch – Jacob
I want your boat, but cannot have it. Spouse doe not like her, particularly after I told her one had even done the NW passage. It is tough to be both old and stupid, but I have managed. Enjoy you venture/adventures! Best to do them before becoming youthless, but I still believe it is possible.
To prevent corrosion of mast again, could you not have used aluminum at base? Since job is done, perhaps you can use super hard rubber pad used to hold heavy compressors etc.?
Alternatively, or perhaps in addition too, you could inject base of mast, say to one foot high, with expandable polyurethane insulation. In this way condensation happening inside mast will not reach base of mast where the two different metal are close. I believe galvanic corrosion will still happened in mast if there is a continuous water film touching both metals.
Polyurethane foam is relatively easy to break up if you ever need to, to run new wiring, for example.
Instead of polyurethane foam you could add inside base of mast small plastic beads or a powdered plastic.
Cheers!